
Introduction
Welcome to the official documentation for Channel Guru — Weego's ultimate Telegram Channel Management and Member Engagement automation suite. Built on high-performance webhooks and powered by robust Python/aiogram engines, Channel Guru automates repetitive tasks to save time and boost growth.
For channel administrators, converting join requests and capturing new member attention can be tedious. Channel Guru automates these processes. When a user requests to join your private channel, Channel Guru instantly auto-approves the request and sends a highly personalized greeting message directly to their private chat window.
How It Works (The Join Request Flow)
Channel Guru acts as a real-time event pipeline when users request to join private channels:
Core Features Dashboard
Getting Started
Configure Channel Guru for your Telegram channels in less than 3 minutes. Follow this step-by-step onboarding guide:
-
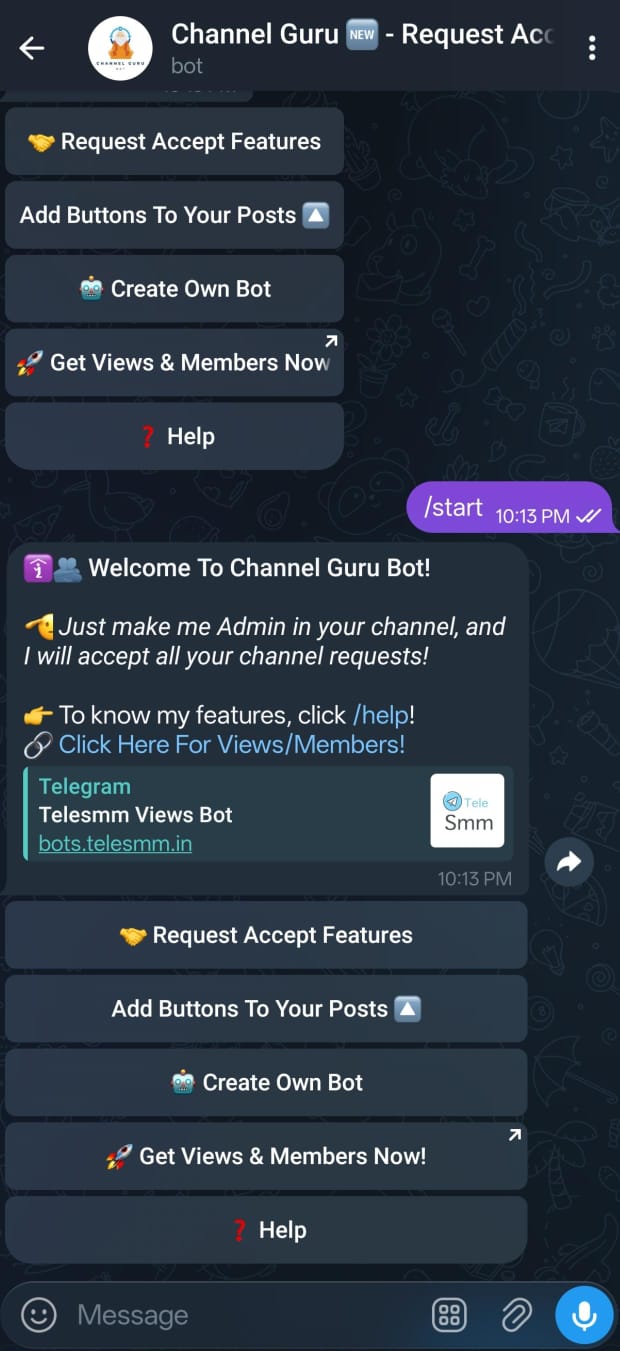
1Start @ChannelGuruBot Master Bot
Open Telegram, search for @ChannelGuruBot, and press Start. You'll be greeted with the main control keyboard.
-
2Add the Bot as an Administrator
Add @ChannelGuruBot (or your white-labeled custom bot) as an Administrator in your target channel. The bot requires the following permissions:
- Post Messages: Allowed.
- Invite Users via Link: Allowed (crucial to register joining approvals).
Administrator Rights Needed: If the bot is not added as an administrator or permissions are missing, it cannot auto-approve join requests. The bot will reject channel binding and display the warning:"The Bot is not an Admin in your Channel ☹". -
3Link Your Telegram Channel
In the bot menu, click the Add Channel callback button. The bot will enter channel binding mode and prompt you:
Bot Prompt🔄 Forward a post from your channelGo to your channel, select any post, and forward it directly to the bot. This allows the bot to fetch the official Chat ID and verify ownership.
-
4Configure Greet Messages
Once verified, the bot checks if the channel is already registered. If new, it prompts you to set your Greeting Message:
- Default Greeting: Click Default to use Weego's built-in welcome.
- Custom Greeting: Click Custom and send your tailored greeting message (texts, files, or pictures). Confirm with Yes when previewed.
On success, the bot displays:
"Channel Data Inserted Successfully ✅📊".
Auto-Approvals & Joins
Channel Guru's primary automation is the real-time, zero-latency processing of chat join requests. This section explains how requests are captured, processed, and tracked in the database.
How Telegram Join Requests Work
Private Telegram channels can restrict open access by enabling "Request Admin Approval" on invite links. When users click this link, instead of joining immediately, they trigger a join request event. Channel Guru handles this event using the chat_join_request listener.
Behind the Scenes Processing
When a join request is received, the bot executes the following logic workflow:
Database Mappings
Channel Guru saves subscriber metrics to the database. Even if a user leaves your channel later, their profile remains stored for re-engagement announcements. The data mapped includes:
bot_id: Mapped ID of the bot.channel_id: Telegram ID of the channel.user_id: Unique Telegram ID of the subscriber.channel_name: Title of the linked channel.owner_id: Mapped Telegram ID of the bot administrator.
unlinked_users database table to prevent data loss.
Personalized Welcomes
Channel Guru allows bot owners to customize the greeting welcome message sent to subscribers upon auto-approval, replacing generic system messages with engaging branding.
Greeting Formats Available
| Type | Method | Support Details & Rich Formatting |
|---|---|---|
| Default Greeting | Built-in | A clean text message greeting the user with their name and prompting them to use /start. |
| Custom Text Greeting | Database-Stored | Supports Markdown formatting, emojis, custom links, and bold headers. |
| Rich-Media Greeting | Bot Copy Message | Supports images, videos, animated GIFs, audio files, and customized inline button panels. |
The Default Greeting Template
If you don't configure a custom message, the system falls back to this template:
Hey {username},
Your Request is Accepted By Channel Guru Bot 🛐!

To Know My Features Send /start or /help!
Managing and Editing Greetings
You can update a channel's greeting message at any time through the My Channels dashboard:
- Click My Channels and select your target channel from the list.
- Select Message from the options menu. The bot will copy and show a live preview of your active welcome greeting.
- Tap the Change button. The bot will prompt:
"📝 Send New Post". - Send your new styled message, media file, or buttons to the bot.
- Review the preview and confirm by tapping Yes to save.
Button & Post Creator
Posts with inline buttons have significantly higher click-through rates. Channel Guru features an interactive Post Maker to attach styled buttons directly to your posts.
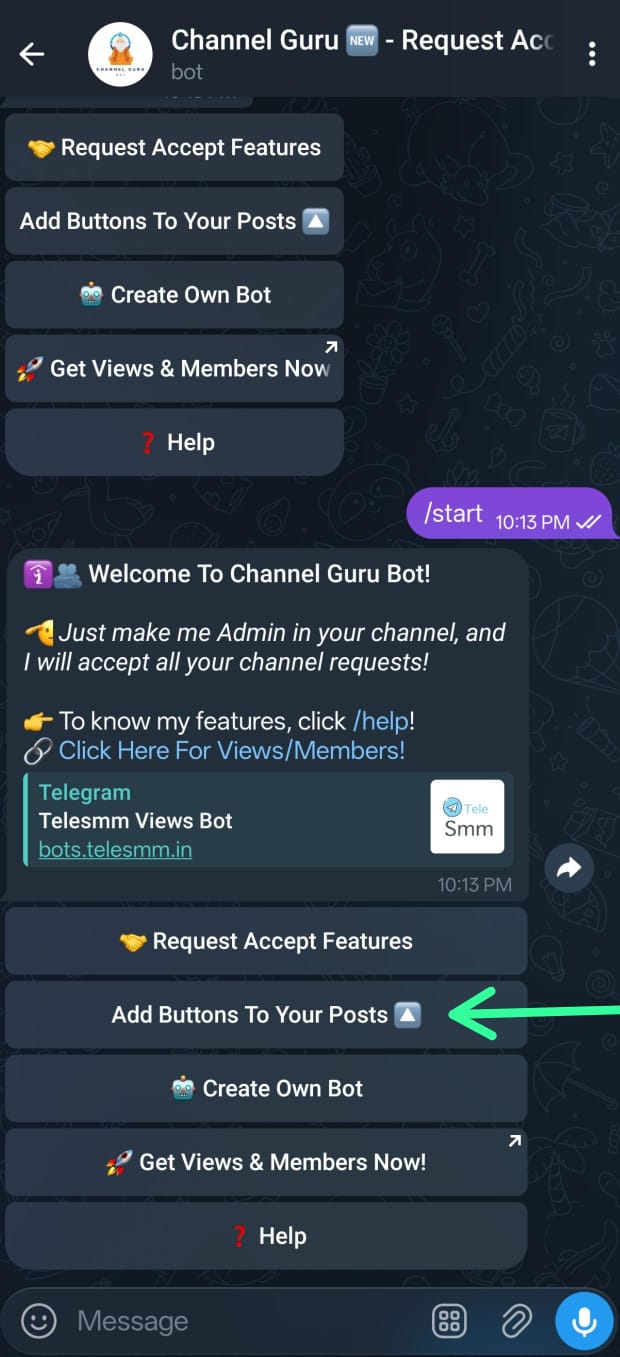
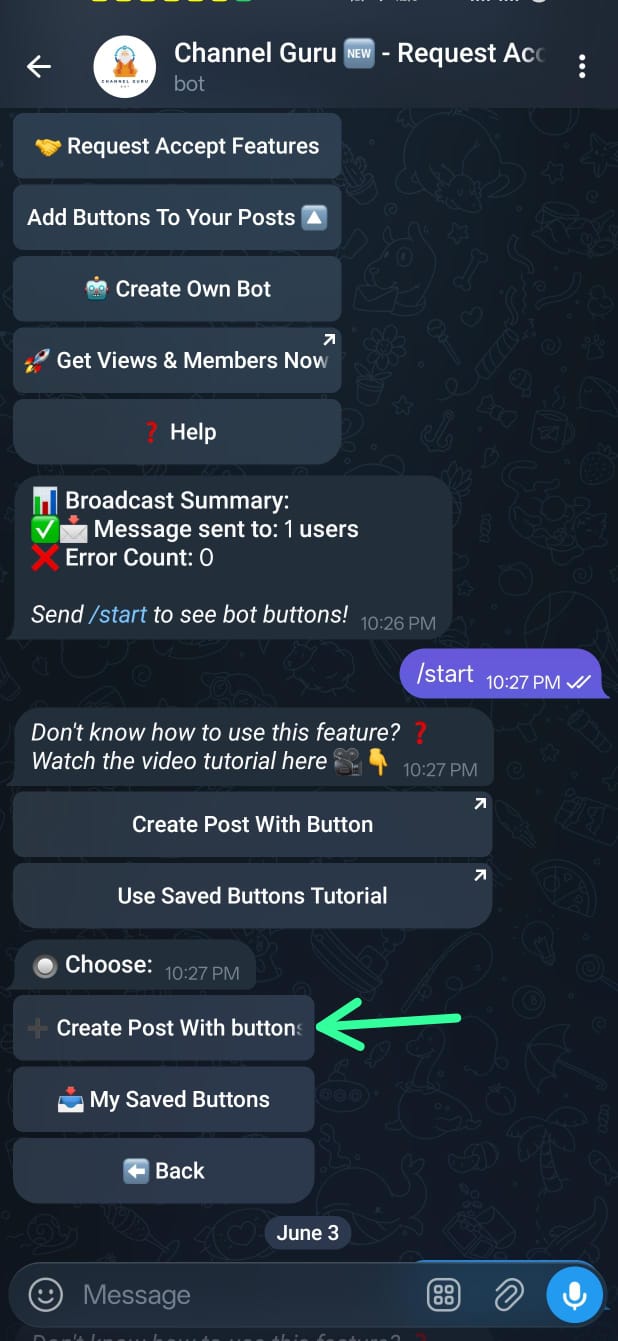
How to Build a Post with Buttons
- In the bot's main menu, select the Post Creator button. The bot will prompt:
"👉 Forward the post in which you want to attach buttons, or send any message or picture!" - Send your post content. You can submit:
- Plain text messages.
- Photos with captions.
- Videos, animations (GIFs), voice notes, or documents.
Stickers Blocked: Telegram stickers are not compatible with inline keyboards. Sending a sticker will prompt:"❌ Cannot edit stickers. Try something else.". - Once the post is previewed, the bot replies with the Post Maker Help manual and an interactive panel with options: Buttons and Get Post.
- Tap Buttons to add an inline option:
- Submit Button Text: The bot prompts:
"🔤 Send text for button"(e.g.Join Official Channel). - Submit Button Link: The bot prompts:
"🔗 Enter Link or Username For the Button!".
- Submit Button Text: The bot prompts:
- Confirm the link format. The system accepts:
- Telegram Usernames starting with
@(e.g.,@WeegoTech). - Standard HTTPS URLs (e.g.,
https://weego.tech).
"🚫🔗 The button url is incorrect". - Telegram Usernames starting with
- On success, the bot displays:
"✅ Button saved"and shows an updated preview of your post with the button. - Repeat the process to add multiple buttons. Tap Get Post to receive the final message with the active inline keyboard, ready to be forwarded or scheduled.
"🛑🤚 You can only add 5 buttons".
Targeted Broadcasts
Channel Guru includes a multi-threaded Broadcasting Engine, enabling owners to send mass updates and announcements to channel subscribers stored in the database.
Broadcast Delivery Options
| Delivery Mode | Database Query | Target Audience Description |
|---|---|---|
| All Users | all_clients(owner=id, col='*') |
Delivers the announcement to every subscriber across all your linked channels. |
| Channel-Wise | all_clients(owner=id, channel=id) |
Targets only the subscribers of a specific selected channel. |
Executing a Broadcast
- Tap Broadcast Message in the main dashboard. The bot queries the database and displays your total audience size:
"👥 You have a total of {X} users!". - Select All Users or Channel-Wise (which prompts you to select a linked channel).
- The bot will ask:
"📤 Send message to how many users?". Enter the target subscriber count. - Send the announcement content (supports text, styling, pictures, and inline buttons).
- The bot displays a preview. Tap Yes to confirm. The bot will confirm:
"Broadcasting Started 📢".
High-Performance Background Threads
Sending mass messages sequentially can freeze single-threaded bots. Channel Guru solves this by spawning a separate background thread for delivery, allowing the bot to continue processing approvals without interruption:
Custom White-Labeling
Promoting a generic bot can dilute your brand. Channel Guru's premium White-Labeling Engine allows you to host and run the auto-approval system under your own custom bot identities.
How to Add Your Custom Bot
- Create a new bot using Telegram's official bot architect: @BotFather. Save the generated HTTP API token.
- In Channel Guru, tap Add Bot from the main menu. The bot will prompt:
"🔑 Enter your bot token". - Send your Bot Token (e.g.
876452391:AAHxF...). - Channel Guru validates the token, programmatically configures the webhook, and registers it in the system:
API Handshake Flow
- Token Ping: The system sends a check ping to Telegram Bot API with the submitted token.
- Set Webhook: Programmatically requests Telegram to direct all bot events to our high-speed secure endpoint.
- DB Save: Registers bot credentials securely inside the user database to isolate and host the bot white-labeled.
- On success, the bot displays:
"🚀 @YourBotUsername is LIVE and has started successfully! 🎉".
Managing Your White-Label Bots
Access your custom bots through the My Bots menu to view active details and manage settings:
🤖 Bot Username: @MyChannelApprovalBot
🔑 Bot Token: 876452391:AAHxF...

Choose an option to edit:
Control Options
- ON/OFF Switch:
- Turn OFF: Disables the webhook to stop approvals:
"Bot is turned 🔴 OFF". - Turn ON: Re-activates the webhook to resume approvals:
"Bot is turned 🟢 ON".
- Turn OFF: Disables the webhook to stop approvals:
- Remove: Prompts:
"❓ Are you sure you want to remove this bot? 🤖". Confirming deletes it from the database and removes the webhook configuration, returning:"🗑️✅ The Bot has been deleted successfully.".